DIY Tissue Box Halloween Costume
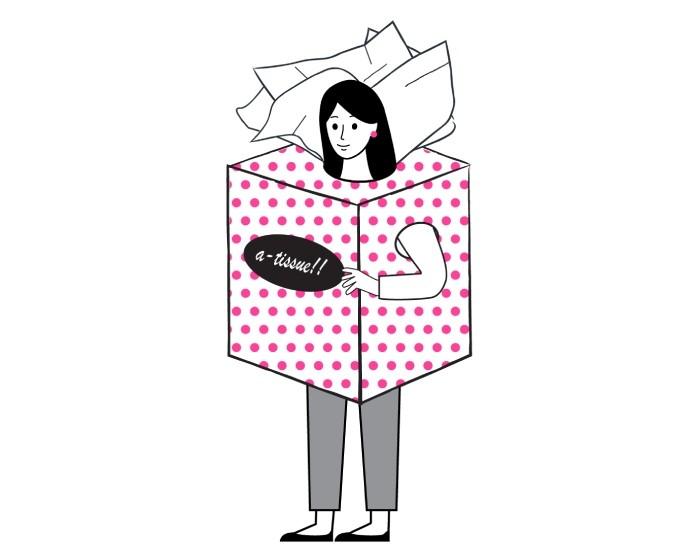
Not sure what to wear for Halloween? Try this easy DIY Tissue Box Halloween costume. It’s fun, lightweight, and surprisingly quick to make. And the best part? You can reuse a cardboard moving box you may already have at home.
It’s an affordable way to bring a little creativity to your costume, whether you’re dressing up a kid, a teen, or yourself. So, before you head out to a party or go trick-or-treating, here’s how to turn a simple moving box into something charming and cheerful.
Article Summary
- A tissue box Halloween costume is simple to make and starts with a cardboard moving box. Choosing the right size helps the costume sit comfortably, making it easy to walk, play, and enjoy the night.
- Wrapping paper, tape, scissors, and colored paper help transform the box into a bright, recognizable “brand.” Even a few simple details can make the costume look polished and instantly familiar.
- Tissue paper tucked around the neck creates the fluffy pop-up tissue effect that brings the whole costume together. It adds height, movement, and that playful “pull a tissue” moment everyone recognizes.
- This costume is budget-friendly and a great way to reuse moving boxes instead of tossing them in the recycling bin. It’s an easy win for your wallet and for giving your boxes a second life after a move.
- With a few steps and a little creativity, this DIY project becomes a quick, fun Halloween outfit for all ages. It’s lightweight, charming, and perfect for last minute costume plans.
- Moving boxes can be useful long after unpacking, especially for simple DIY projects like Halloween costumes. Piece of Cake Moving & Storage provides sturdy boxes and packing supplies that protect your belongings during a move and can be repurposed for creative projects once moving day is complete.
What You’ll Need for Your DIY Tissue Box Costume
Tools
Scissors
Utility knife
Materials
Cardboard moving box (small for kids, large for adults)
Clear tape
Wrapping paper
White tissue paper
Marker
Construction or printer paper
If you’ve recently moved or have shipping boxes waiting to be recycled, this costume is a perfect second life for them. Most moving boxes have a sturdy structure that holds up well throughout a night of walking and trick-or-treating.
How to Make a DIY Tissue Box Costume Using Boxes
This costume comes together in just a few easy steps. By the time you tape down the last corner, you’ll have a colorful, wearable tissue box that’s comfortable enough for an evening out.
Step 1: Prepare the base box
Start by checking the top and bottom flaps of your cardboard moving box. If the flaps of the cardboard moving box are taped up, cut open one side of the box. This is the end that the wearer’s legs will go through. Tape the flaps on the other side closed (if they aren’t already).
Step 2: Cut the head opening
On the taped side of the box (the top), cut a hole large enough for the person's head to fit through comfortably. Keep the edges smooth so nothing scratches your neck.
Step 3: Create the arm holes
Cut circular or oval-shaped holes for the arms on both sides of the box. Aim for a size that allows easy movement without being too loose. The wearer should be able to grab candy, hold their bag, and move naturally.
Step 4: Wrap the box
Cover the outside of the box with wrapping paper. Any fun pattern works. Solid colors, stripes, polka dots, or brand-inspired prints all look great. Use clear tape to secure the paper. Once wrapped, carefully cut out the head and arm openings again so the costume sits comfortably.
Step 5: Add the logo or “brand” label
If you have a favorite brand of tissues, use the marker and construction or printer paper to draw the logo. Cut out the shape of the logo with scissors and then tape it to the box.
Step 6: Attach the “tissue”
After putting the box over your head and threading your arms through the arm holes, tuck pieces of tissue paper around your neck and head. Fluff the paper out a bit to help it stand upright. Use tape as needed to secure it inside of the hole opening.
Then you’re all set!
Get Creative With Your Moving Boxes
If you’re planning a move or finishing up a recent unpack, leftover moving boxes can still be useful long after moving day. DIY costumes are a simple way to repurpose sturdy cardboard instead of throwing it away, especially for quick Halloween projects that need structure and shape.
When you need boxes that hold up through packing and can still be reused afterward, Piece of Cake Moving & Storage offers durable packing supplies designed to protect your belongings during the move and stay useful once the boxes are empty.