How to pack kitchen items
Anyone who has moved a house before, knows that how to pack kitchen items properly makes all the difference between time consuming to pack vs. easy and effortless packing. Apart from the range of individual items to remove from cupboards and drawers, the difficulty factor in this room is high because of all the breakable and irregular shaped objects.
Our professional hints and tips will help you fast track the process and approach it with a plan that enables your household to keep functioning as long as possible before move day.
Give yourself at least a few days to tackle packing your kitchen.
1. How to pack a kitchen effectively
There are two key preparation steps:
- Disposing of items that don’t need to move with you
- Gathering the right materials for the job
Begin with a ‘must take’ mindset. Kitchens are notorious places for hanging onto chipped items and unused gadgets.
Before you begin packing your kitchen, Ttake a look at the back of your cupboards and drawers and pull out those items you haven’t looked at or used for at least 12 months. Sentimental items are an exception here. Working but unused appliances can be gifted, while chipped crockery and glasses should be disposed of or recycled. The same applies to old cleaning materials gathering cobwebs under the sink or any item you wouldn’t use again.
Your pantry is another great stop on the culling tour of packing your kitchen. Condiments have a great shelf life, but there is always a limit. One of the bonuses to clearing your pantry is identifying canned goods or other non-perishables you can cook before you leave – saving your budget and limiting waste.
Once that’s done, you want to bring in the packing materials to pack your kitchen for moving. The headline here is that packing paper is your best friend in the kitchen. Printed and used newspapers are thin and can leave ink behind on your belongings. Packing paper is thicker, sturdier, and provides a range of functions from protection to buffering between items and is your key weapon against breaks. If you’ve never used it before, we’ve got some great tips from our expert movers for you later in this guide.
With regards to other supplies, to pack large kitchens we recommended a mix of 15 to 20 large and medium boxes. For smaller kitchens, we recommended a mix of 10 to 15 large and medium boxes. These are only recommendations as each kitchen is unique, and how many items you have may vary depending on how often you use your kitchen.
Finally, pick up some packing tape, markers and cling plastic wrap (the kind you use to cover food is absolutely effective here), with 2-3 rolls of packing paper at a minimum. There are also specialty dividers you might want to purchase for items such as stemware but they’re a ‘nice to have’ rather than an essential.
2. Keep the kitchen functioning before your move day
For most people, packing up the entire kitchen for moving ahead of time is impractical, so we recommend setting aside a few essentials to pack last.
These should include:
- A set of cutlery, glass, and plate/bowl for each member of the house.
- Essential utensils such as a wooden spoon and bread knife.
- A general use frying pan and a medium sized pot
- A strainer and mixing bowl
- Cleaning products for washing up, including a sponge
- Optional extras for breakfast: a kettle, toaster, and a mug for each person
It may seem like a long list, but once you start packing the rest of your tableware, utensils, pots and pans, and appliances it will make a lot of sense.
Identify one cupboard where you can place these items while you pack the rest of the kitchen. You should also set aside a medium-sized to large-sized box to pack these final items the day before your move.
3. Time to start packing your kitchen
Now you’re ready to lay your packing paper out on the counter top and get started. Have your marker handy to label your boxes and your inventory list to number your boxes.
The easiest items to pack first are infrequently used items such as baking supplies, vases and special event dishes such as cake stands.
It is important to note that kitchen boxes can get very heavy, very quickly, as glassware and plates packed together can really add up. Don’t overpack your boxes and if in doubt, test how heavy they’re becoming as you go. Even though your movers are strong and will have moving equipment to shift your belongings, very heavy boxes are more susceptible to damage during the moving transit.
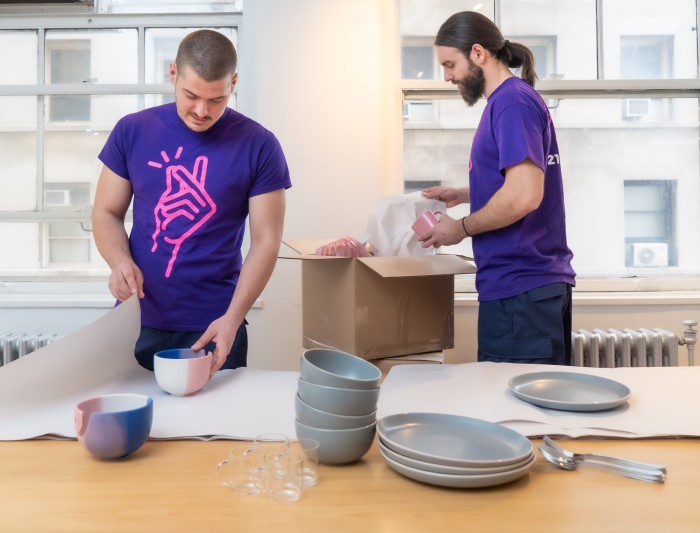
However you choose to begin packing your kitchen items, open a cupboard or drawer and start wrapping and grouping items along our guidelines below:
- Line the inside of your box with packing paper. You want to take some paper and scrunch it up and place it at the bottom. It acts as a cushion to protect your items while they’re stacked and unstacked during your move.
- On a clear table or bench, place a plate in the middle of your packing paper, fold a couple of sheets of paper over it and then place another plate over the top. Continue this process until you have a stack of four plates and then wrap another layer of paper around them or keep the stack securely tightened with cling wrap.
- When stacking bundles of plates in your boxes, place them horizontally to help reduce the risk of damage.
- Repeat this process with bowls, grouping them in stacks of two and then also placing them horizontally.
- Once you have filled the base of the box with these heavier items, use a buffer layer of packing paper before adding the second layer of items if the box is not too heavy. You want to take some paper and scrunch it up and place it above the packed items. It acts as a cushion to protect your items while they’re stacked and unstacked during your move.
- Glasses should never be placed at the base of a box with significant weight sitting on top of them, but they can be added to the second layer. They should be wrapped individually and placed standing up.
- Allow for enough paper to protect a handle if you have cups with handles.
- Utensils can be wrapped in groupings of 4-6 to keep them uniform. They can be laid across the top of your boxes before you close them.
- Similarly, cutlery or flatware items should also be bundled together tightly with cling wrap, i.e. knives with knives and spoons with spoons. Place knives on their side, never facing upwards with the point towards the openings of the box. Some professional packers wrap plastic around the entire cutlery tray and move these items as they are stored in the drawer. This option depends on personal choice and the value of your flatware.
- For very sharp knives, it is worth packing them into a large tupperware container or wrapping a kitchen towel around them and securing it with rubber bands for safety.
- Use a separate box for pot and pans, other containers, and larger utensils.
- Wrap each pot and lid separately and use the nesting method where possible to stack smaller items within larger items.
- Place buffering support around your pots and pans using rolled up tea towels or stuffing packing paper between the gaps.
- Use a small box for pantry items and canned goods. Breakables containing liquid should be wrapped into plastic bags to help prevent leaks. Stuff some paper between glass jars of condiments or spices. The more you can limit the number of food items you pack the better, but we understand sometimes truffle oils or those saffron threads are worth their weight in gold!
- Small and medium sized appliances are best transported individually in boxes that will limit how much they move during transportation. For expensive and irregular shaped appliances, you should also be sure to unplug them ahead of time and prepare them for transportation,. Tape down any moving parts, remove any accessories and add packing paper around them for padding once inside the box.
- Large appliances should be allocated a much longer period for moving, especially where they need to be disconnected from gas mains or the water supply. Even if you are leaving them behind, fridges need to be defrosted, so allocate ample time for doing that properly and cleaning it afterwards. If it’s coming with you, your fridge should also be completely empty on your move day. Your movers will retract these larger items from the wall for you, as long as they are disconnected, we will do the rest.
- Vases should be individually wrapped and padded well, in as small a box as they can fit.
- Wine bottles should only be packed if unopened. Specialized wine moving boxes are available to make this process simpler. While moving a few bottles with your kitchen is fairly standard, for those with a valuable wine collection, please consider whether you need a separate process to value, prepare, and transport your high value wines in a climate controlled environment with our custom crating service and a High Value Inventory procedure. Ask the Piece of Cake customer support team for more details.
- Everything else including cookbooks, dish racks, and baking trays should be packed normally, adhering to the main packing principles of putting heavier items at the base of your box and lighter items towards the top.
4. A special consideration when packing stemware and fragile kitchen items
You can get a little extra with prepping your fragile stemware. As well as wrapping them carefully individually, you can also place them between cardboard dividers that slide into your moving boxes to protect each row from pressing against the other during transportation.
It’s best not to stack anything above your stemware, even if there is room in the box. Just pack as much paper in these as securely as possible, and be sure to mark it as fragile with arrows indicating which side should be kept upright.
Be generous with the packing paper or bubble wrap for irregularly shaped items like fine china teapots, and use cardboard dividers to keep everything in the optimum position.
5. Moving perishable food
For health and safety reasons, your mover will not move perishable food on the day of you move such as your milk, eggs, frozen cake, meat, fruit etc. These items will not be packed and moved on a truck.
For this reason, and to help minimize waste, it is best to try and phase out grocery shopping before your move day.
Any remaining food essentials you would like to take with you to make your meal in your new home quickly accessible, should be taken with you, via your car or mode of transport to your drop off location, and packed in an icebox, cooler, or insulated bag.
6. Recap on how to pack your kitchen items
As a general rule, follow these kitchen packing principles:
- Double tape the base of your boxes and line the inside of the bottom with stuffed and scrunched moving paper
- Set aside your essential items at the start and pack this box last
- Larger boxes are best used for heavy items at the bottom and lighter items on the top
- Medium boxes are best used for appliances, pots and pans and less breakable items
- Small boxes are best used for canned food and pantry items
- Heavier items should be placed in the base of the box with lighter items towards the top
- Avoid overloading your boxes, this increases their likelihood of tipping when stacked. Once a box is almost full, use packing paper to buffer the box to the level of the lid
- Depending on your budget, consider specialist boxes for fragile items like stemware, and packing materials such as cushion foam, bubble wrap, and packing peanuts
- Label, label, and label. You get our drift. The more detailed your inventory list is for each box, the easier it will be to find it quickly amongst the many boxes once you reach your destination
Once you’re done packing, the next stage of work in the kitchen begins, especially if you’re renting, which involves cleaning and removing marks from surfaces, built-in appliances, and floors.
At least the hardest part is now done! If there was ever a time to order a pizza and put your feet up, this is one of them, for a job well done on packing all of your kitchen items!
Ready to make a move? Get in touch today for an obligation-free guaranteed flat price moving quote.
Related articles
![Average Moving Costs in Charlotte, North Carolina [2026 Guide]](https://mypieceofcakemove.com/wp-content/uploads/2026/05/Average-Moving-Costs-in-Charlotte-North-Carolina-2026_Guide-700x441.jpg "Average Moving Costs in Charlotte, North Carolina [2026 Guide]")
Average Moving Costs in Charlotte, North Carolina [2026 Guide]
Learn More
![Average Moving Costs in Washington, D.C. [2026 Guide]](https://mypieceofcakemove.com/wp-content/uploads/2026/05/Average-Moving-Costs-in-Washington-D.C.-2026_Guide-700x441.jpg "Average Moving Costs in Washington, D.C. [2026 Guide]")
Average Moving Costs in Washington, D.C. [2026 Guide]
Learn More
![Average Moving Costs in San Francisco [2026 Guide]](https://mypieceofcakemove.com/wp-content/uploads/2026/05/Average-Moving-Costs-in-San-Francisco-2026-Guide-700x441.jpg "Average Moving Costs in San Francisco [2026 Guide]")
Average Moving Costs in San Francisco [2026 Guide]
Learn More
![Average Moving Costs in Dallas [2026 Guide]](https://mypieceofcakemove.com/wp-content/uploads/2026/05/Average-Moving-Costs-in-Dallas-2026-Guide-700x441.jpg "Average Moving Costs in Dallas [2026 Guide]")
Average Moving Costs in Dallas [2026 Guide]
Learn More