DIY Hot Air Balloon Halloween Costume
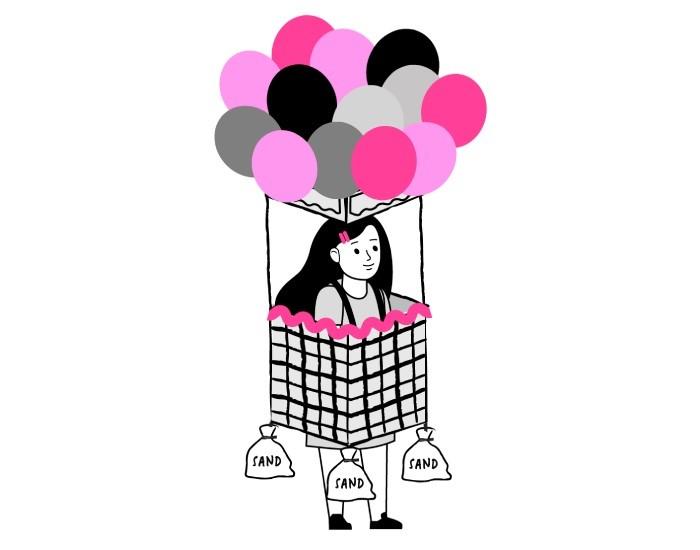
Up, up, and away to trick-or-treating you'll go! This hot air Halloween costume idea will have you flying high on design, but won't take the wind out of your sails with a big price tag. Repurpose your cardboard moving boxes and take flight with this addition to your Halloween festivities.
Article Summary
- A hot air balloon costume is a creative, budget-friendly way to reuse a large cardboard moving box after your move, giving everyday materials a fun second life.
- This DIY only requires simple tools and craft supplies like paint, ribbon, twine, paper bags, and wooden dowels, all easy to find in any craft bin or hardware store.
- Decorating the “basket” with a painted weave pattern helps the costume look realistic while staying lightweight and comfortable for kids and adults.
- Adding helium balloons, a small “sandbag” detail, and easy-to-wear shoulder straps brings the whole costume together while keeping hands free for trick-or-treating.
- After your move, leftover materials don't have to go to waste with crafts like these. And if you'd rather skip cardboard boxes altogether next time, Piece of Cake Moving & Storage offers rentable, stackable plastic bins for a more durable, organized, and eco-friendly moving option. Combined with full service packing, easy online booking, Flat Fee pricing, and 24/7 all year round availability, your next move can be simpler from start to finish.
DIY Hot Air Balloon Costume Using a Moving Box
Turning a cardboard moving box into a hot air balloon costume brings together two satisfying things: getting creative and making the most of what you already have.
Whether it's a box from your latest move or one you've saved from a delivery, this costume proves that ordinary materials can turn into something memorable with a little imagination.
What You'll Need
Tools
- Scissors
- Utility knife
- Paintbrush
Materials
- Large cardboard moving box (big enough to stand inside)
- Wide ribbon
- Thin plastic ribbon
- 4 small paper bags
- Around 20 helium balloons
- Twine
- Paint (dark brown + light brown)
- 4 long wooden dowels
- Wood glue
- Tape
- Natural rope (long enough to wrap around the box)
How to Make Your Hot Air Balloon Costume
Step 1: Shape the Basket
Cut off the top and bottom flaps of the cardboard moving box with scissors. If the box has markings on it already, cover it with dark brown paint. Let the paint dry. You'll start to see the “basket” take shape as the paint settles.
Step 2: Prepare the Balloon Base
Measure 4 inches on the bottom of the box and cut off all the way around, keeping the 4 sides of the section connected. This smaller piece becomes the top frame where the balloons will attach. This step helps the costume feel balanced once you're wearing it.
Step 3: Create the Basket Weave
Use light brown paint to create a basket weave pattern on the outside of the larger box piece. This will be the basket of the hot air balloon. A good tip is to use leftover packing paper as a drop cloth to keep your floor clean.
Step 4: Add the Balloon Supports
Take the 4 wooden dowels and affix them inside of each of the corners of the larger box piece with wood glue (with 5 or so inches of the dowel glued to the inside of the top of the box in the corners). Make sure that the tops of the dowels are even with each other.
Step 5: Decorate the Top Piece
Take the smaller cardboard piece you cut earlier and decorate it with paint or markers. This part doesn't have to be perfect, even simple lines or patterns give it charm.
Step 6: Attach the Balloon Top
Attach the smaller box piece to the top of the wooden dowels, using wood glue to secure the dowels inside of each of the 4 corners of the smaller box piece with wood glue. Make sure the top of the dowels are level with the top of the smaller box piece.
Step 7: Add Rope Details
Take the natural rope and wrap around the outside top of the larger box piece. You could also drape it between the corners of the larger box for a decorative effect. Use tape to affix to the larger box.
Step 8: Add Shoulder Straps
To add shoulder straps to the costume, poke 2 holes about 6 inches apart on each side on opposite sides of the top of the larger box piece. Cut the wide ribbon into 2 pieces long enough to create straps to suspend the costume over the wearer's shoulders.
Take one piece of ribbon and thread it through one hole in the front of the box and tie a knot on the outside of the box. Repeat through the hole on the back of the box. Do the same with the other piece of ribbon and holes to affix the shoulder straps.
Step 9: Create the “Sandbags”
To attach the “sand bags,” poke holes in the bottom of the larger box piece near each of the 4 corners. Use a marker to write “sand” on each of the 4 small paper bags. Stuff the paper bags with extra paper (or packing paper from your last move).
Tie the bags closed with pieces of twine, leaving one end of the twine long. With the long end of the twine, thread the twine through the holes on the bottom of the larger box piece to attach the bags to each corner of the “basket.”
Step 10: Attach the Balloons
Use scissors to cut thin plastic ribbons of different lengths and tie them to the helium balloons. Tie the other end of the ribbons to the top of the hot air balloon “basket” (smaller box piece).
Now you're ready to take flight!
Skip the Cardboard on Your Next Move
Reusing moving boxes for projects like this is a great way to get more life out of them, but if you'd rather avoid cardboard altogether next time, there's a more efficient option. Piece of Cake Moving & Storage offers rentable, stackable plastic bins that are sturdier, easier to pack, and keep everything more organized from start to finish. Combined with full service packing, easy online booking, Flat Fee pricing, and 24/7 all year round availability, your next move can be cleaner, more streamlined, and easier to manage from day one.